
Creating an Autodesk Inventor addin (C#/VB)
Start coding inside Autodesk Inventor by building your first add-in with Visual Studio and the Inventor API.
Ever wanted to automate tasks in Autodesk Inventor or add your own custom tools to the ribbon? This guide will walk you through building your very first Inventor Add-In using C# or VB, step-by-step — from installing Visual Studio to seeing your own button in Inventor’s UI.
Visual studio
Visual Studio is Microsoft’s flagship integrated development environment (IDE). It’s a powerful tool used by developers to write, debug, build, and deploy applications in a variety of languages like C#, VB.NET, C++, and more.
For Autodesk Inventor add-in development, Visual Studio provides:
A code editor with IntelliSense (auto-complete, tooltips, etc.)
Integrated debugging tools
Project templates (including Inventor’s Add-In Wizard)
Easy management of dependencies and build settings
Whether you’re building desktop apps, automation tools, or full-blown Inventor extensions, Visual Studio is the go-to environment for clean, efficient .NET development.
Step 1: Install Visual Studio (Free)
Click this link to go to the download page
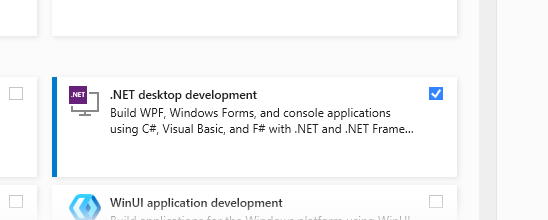
Under Workloads make sure to select .NET Desktop development
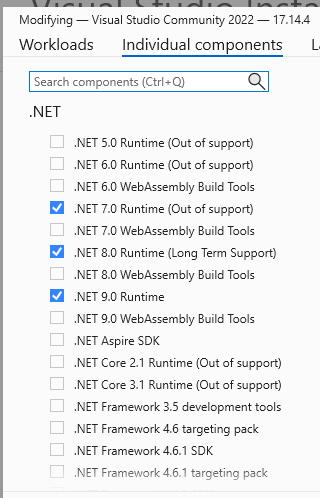
And under Individual components select .NET 8.0
Step 2: Install the Inventor Add-In Template
Autodesk provides a pre-made Add-In Wizard that sets up the boilerplate for you.
Go to C:\Users\Public\Documents\Autodesk\Inventor 2025\SDK

And run developertools.msi
This installs the Inventor Add-In template into Visual Studio — making it easy to create your first project.
Step 3: Create a New Add-In Project
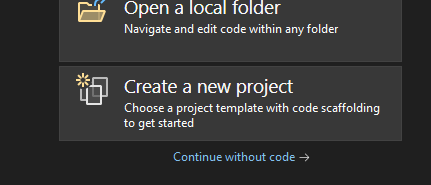
Open Visual Studio and click "Create a new project"
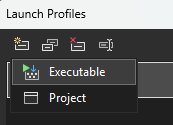
Scroll down or search for "Inventor" and you will have two options:
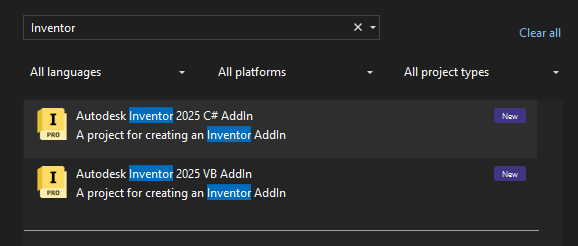
Decide which language you want to use and press next.
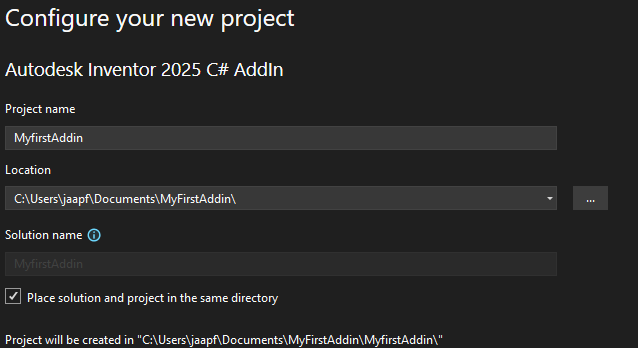
Now decide a name for your project and press create.
Result: You’ll get a C# or VB project with a class that implements ApplicationAddInServer — the core interface for Inventor Add-Ins.
Step 4: Setting up the project
Now, even though this template is very handy, there are still some things we need to do before our addin works.
In the solution explorer, right-click on your project and click "Properties".
-
Go to Build -> Output and set the Base outputh path to C:\ProgramData\Autodesk\Inventor Addins.
-
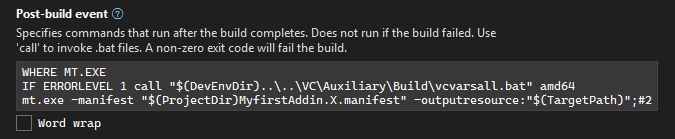
Go to Build -> Events and delete everything from the Post-build event.

Now that that is done, go to your solution explorer again and click on Autodesk.MyFirstAddin.Inventor.addin and set Copy to Output Directory to "Copy if newer"

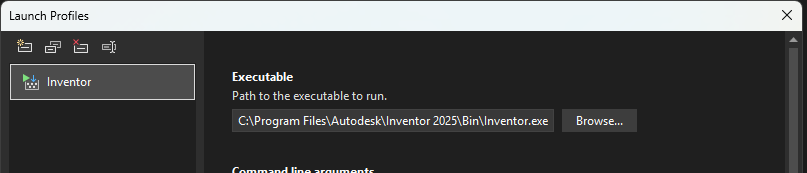
And the last thing we need to do is setup a launch profile.

Create a new executable and name it Inventor.
Set Inventor.exe as executable.
Step 5: Running the add-in
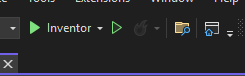
Now that everythng is set up we can start the addin by pressing the Inventor button we created in step 4.
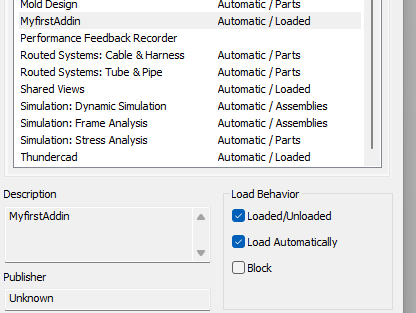
This will build your addin to the addins folder and launch Inventor. When Inventor is launched, you will see the following message:
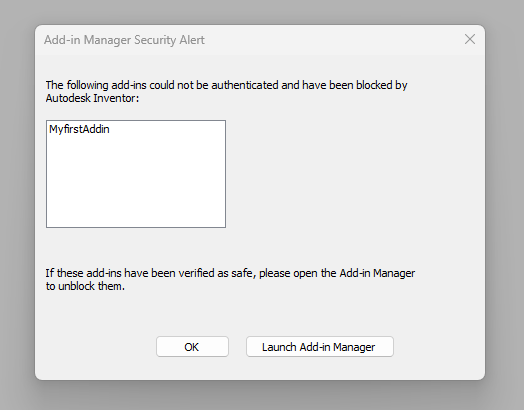
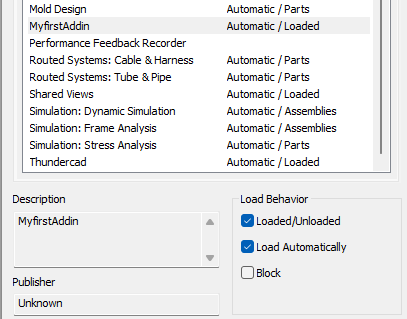
This means the add-in is working! We just have to unblock it. Click on Launch Add-in manager and unblock your addin. It should look like this:
Congratulations, you now have a working add-in!